Waivers are the release of liability, media consent, or any other legally binding document that you would require your registrants to agree to. These are shown before a person reaches the cart page to complete a purchase.
To add/update a waiver from your dashboard, please follow the above steps:
Create a new document
1. Head to your club/event dashboard and select the tab Registration configuration > Waivers.

2. Create a new agreement by clicking on the "Add Agreement" blue button.

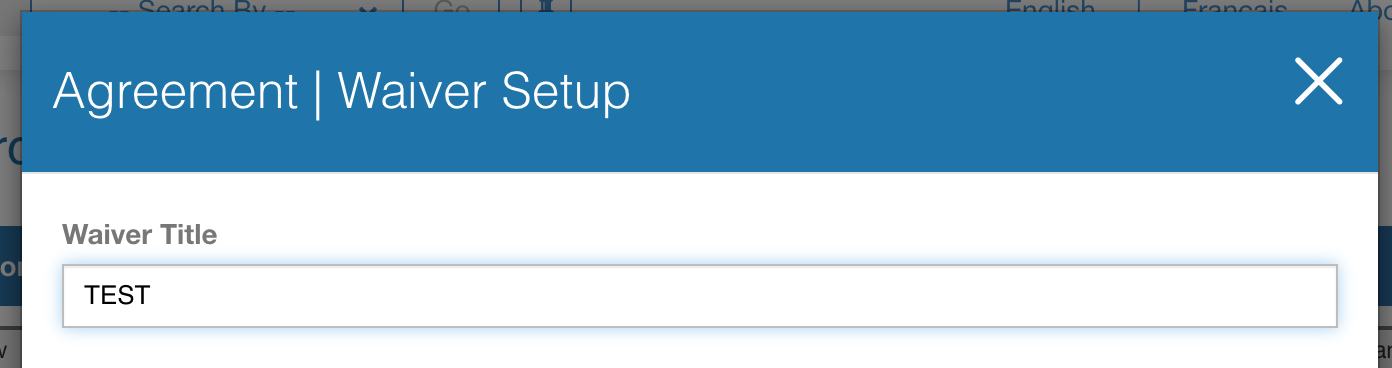
3. Enter the document name (this name is the admin name displaying on your event/club dashboard)
4. Choose what type of document you want to create, based on who will be prompted to sign it.

If you've chosen "purchaser only" type, go to step 6 directly
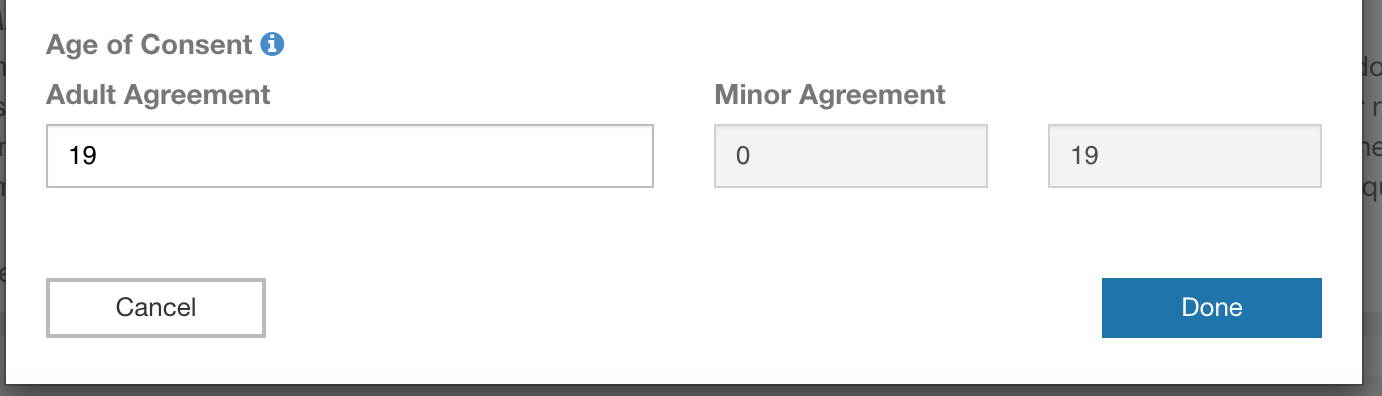
5. If you've chosen the "each participant" option, you need to select whether or not you'll need to create a minor version of your document.

If so, you need to confirm the age of consent applicable for your organization (usually depending on where the event/activity is taking place).
6. Then click Done.
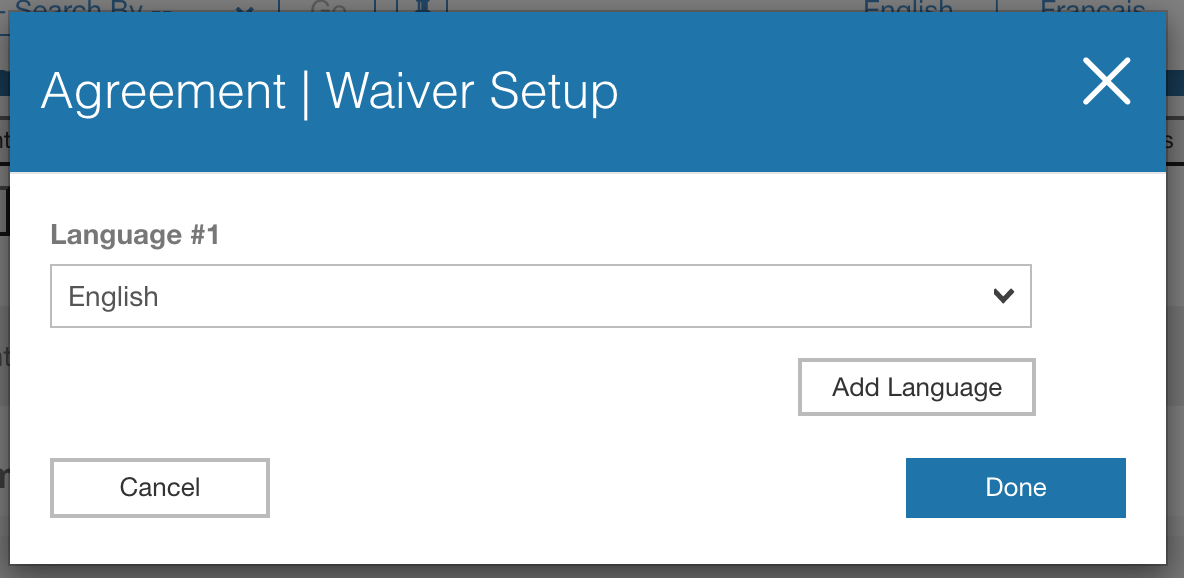
7. Choose the primary language of your document, then you can choose to create the document in multiple languages if needed (only English and French available at the moment).
8. Once you click Done, the waiver will be created and the editor will open automatically so you can enter the content (title + body)
If you've chosen to have a minor version, you need to complete the title and the body for both types (adult and minor) even if you add the exact same content.
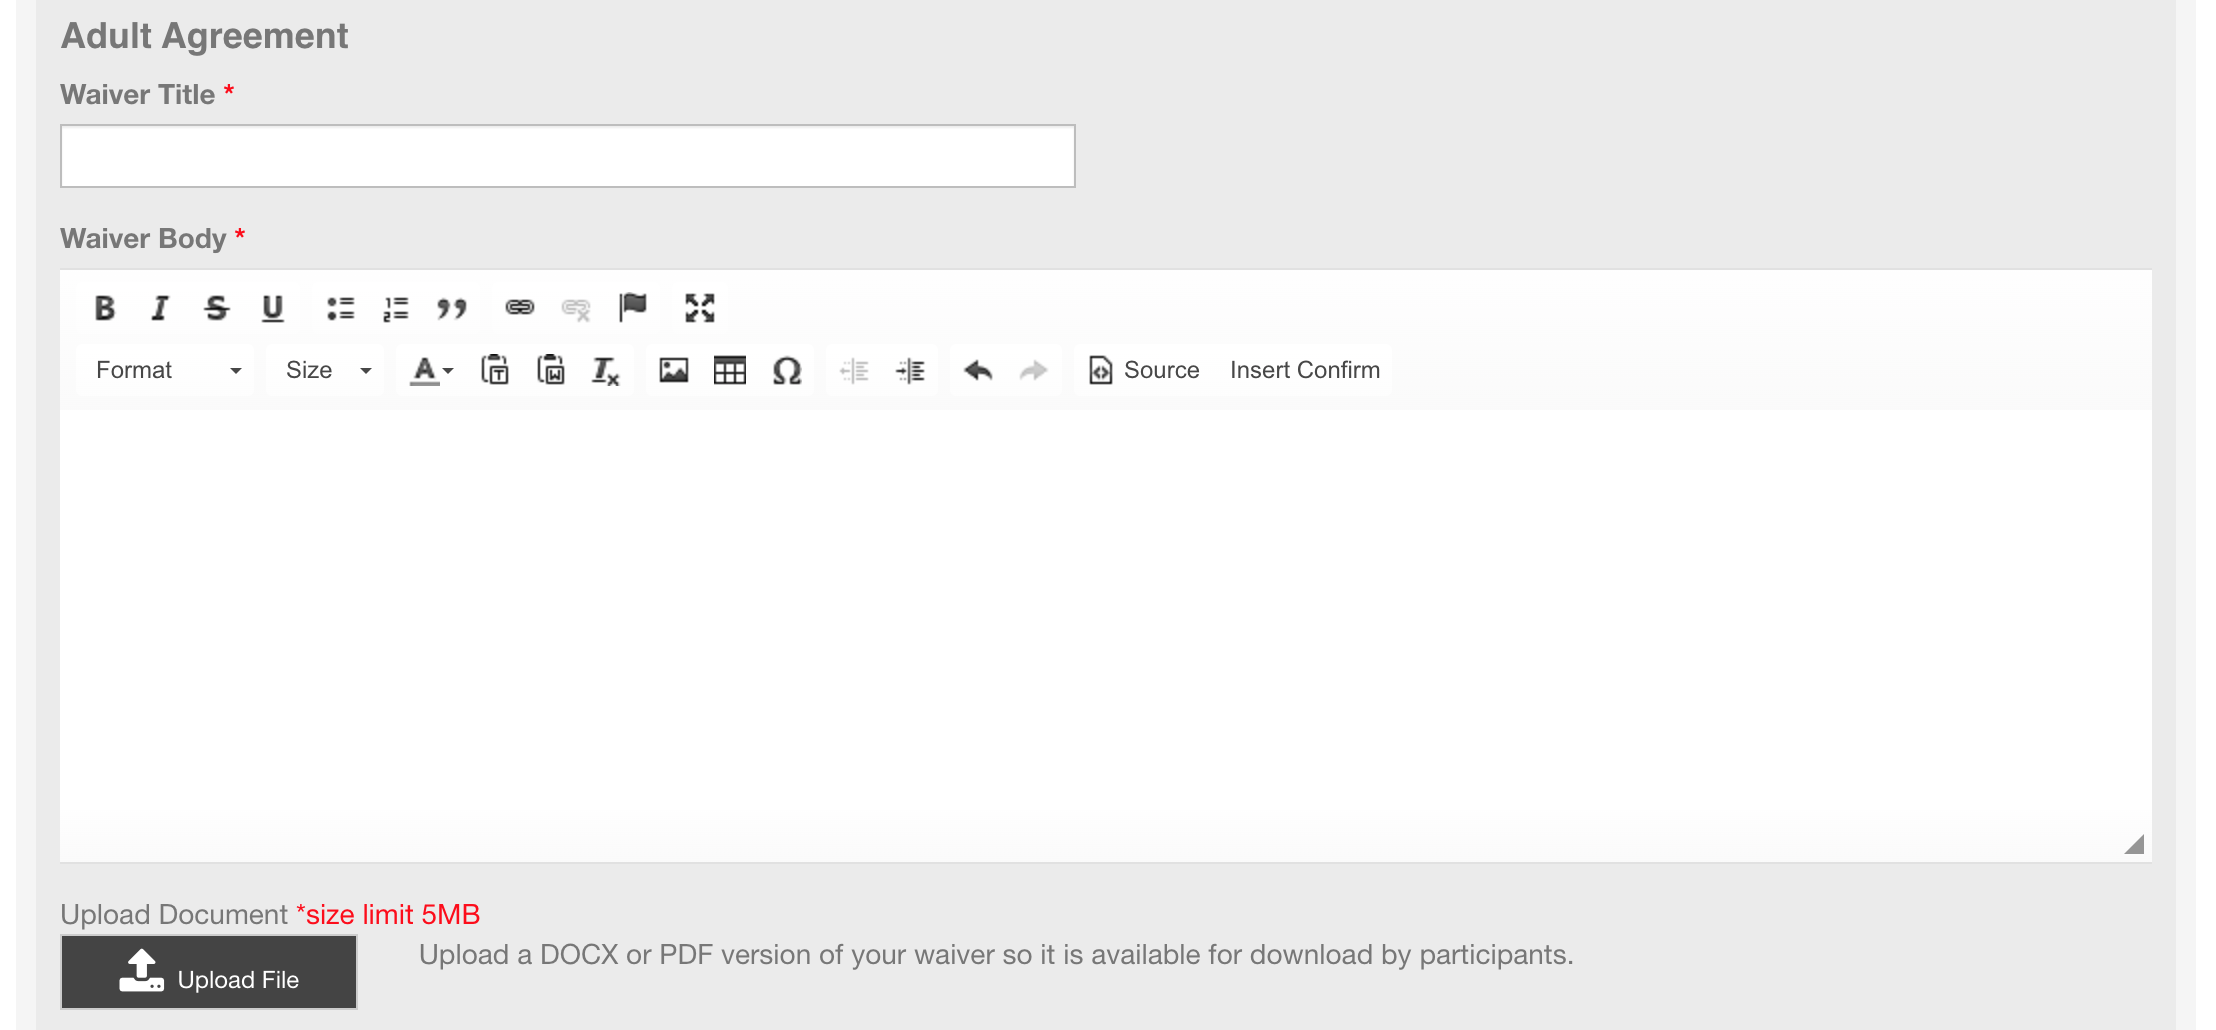
Note: you can add a PDF version of your waiver for people to download as a copy if they want to, by using the 'upload file' button.
Then click Save. The waiver is now complete and will be shown in view mode as follows:
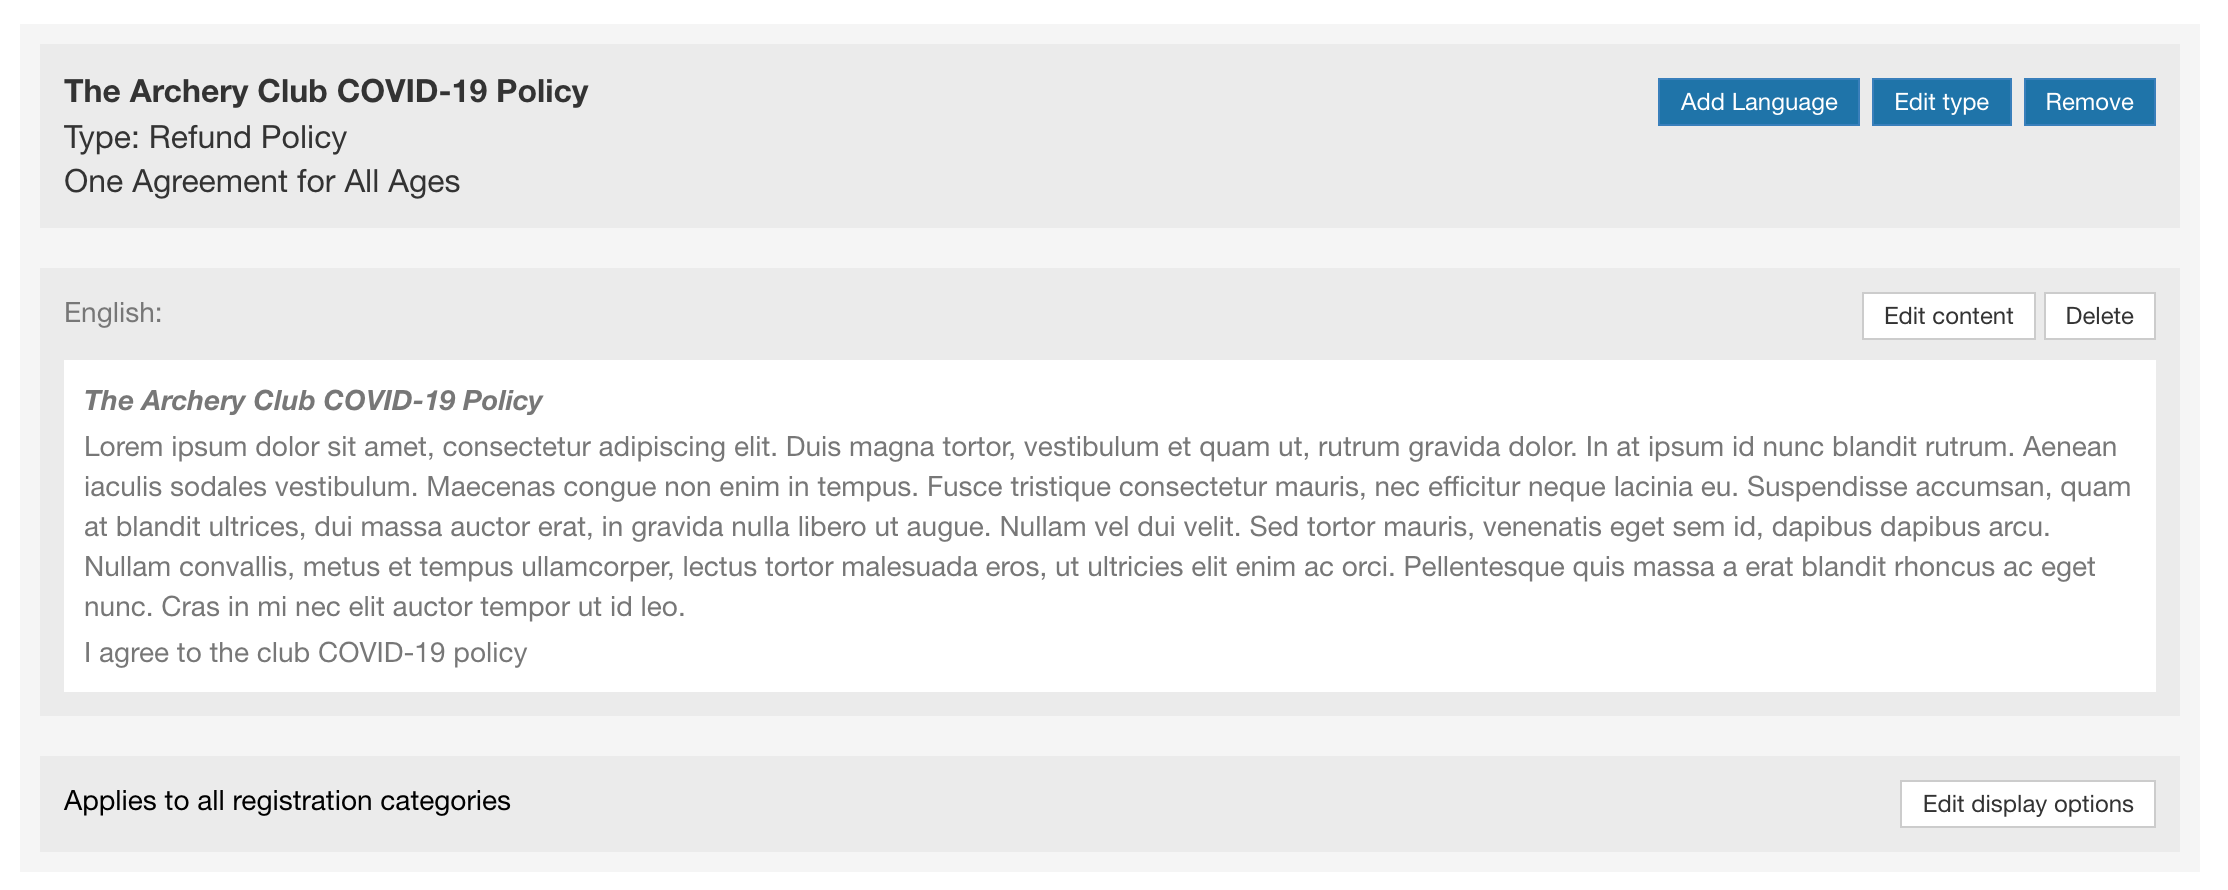
From there you can edit the content or type of waivers if needed.
Reuse an existing document
1. Go to your club/event dashboard and select the tabs Registration configuration > Waivers
2. You can reuse an existing document by clicking on Reuse existing agreement

3. Search for the document you want to reuse by name, and select it. Then you need to choose between "add the existing agreement" OR "clone the agreement and create a copy".
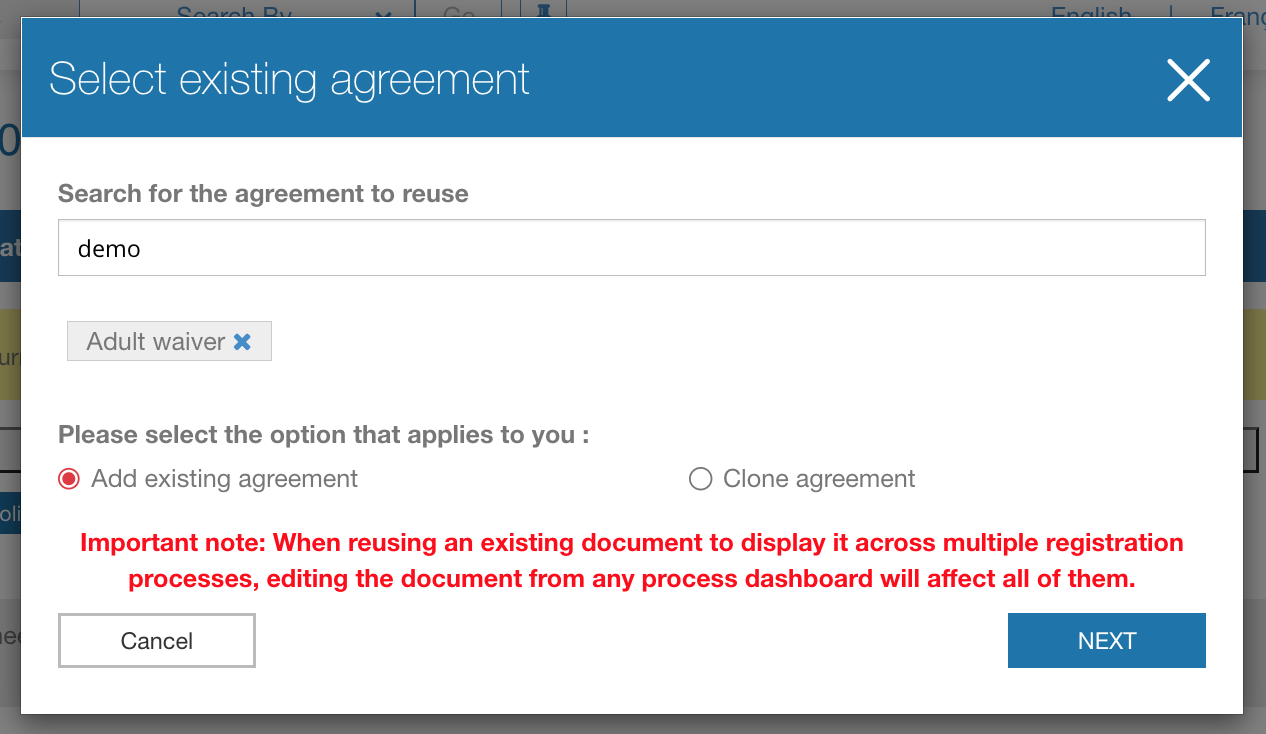
Important note
- When reusing an existing document to display it across multiple registration processes, editing the document from any process dashboard will affect all of them.
- When cloning an agreement, the edit you make on the new document will only affect the new event
4. The document gets added to your current setup, and you can edit it if needed (see steps below)
Edit an existing document
- To make changes, click the white edit content button.
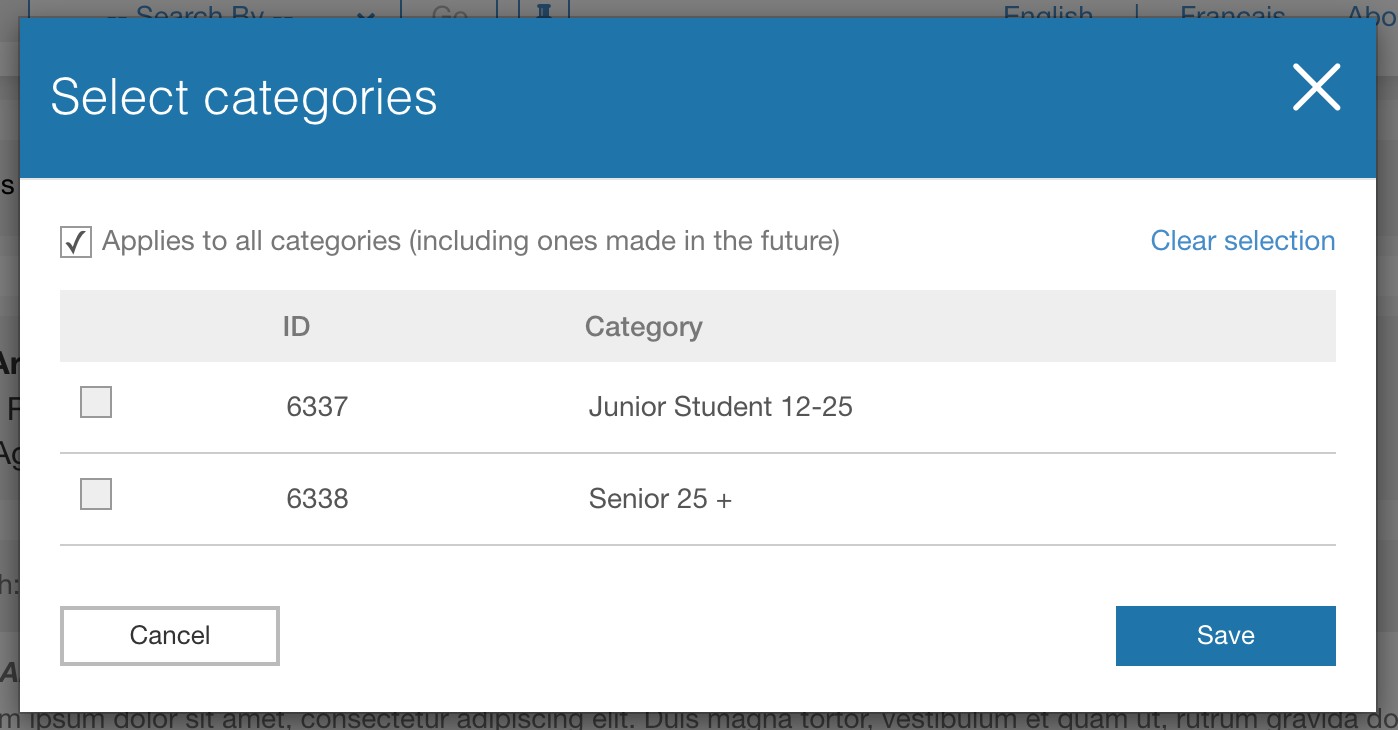
- To edit the display (meaning which registration categories the document will show up for), click on the white edit display options button, then choose the registration categories that the document should apply to by selecting them in the pop-up window:
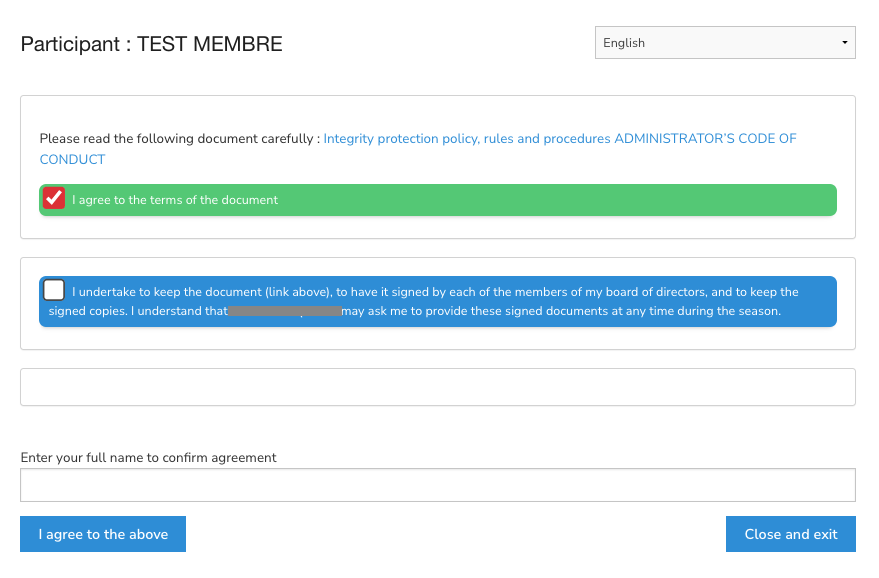
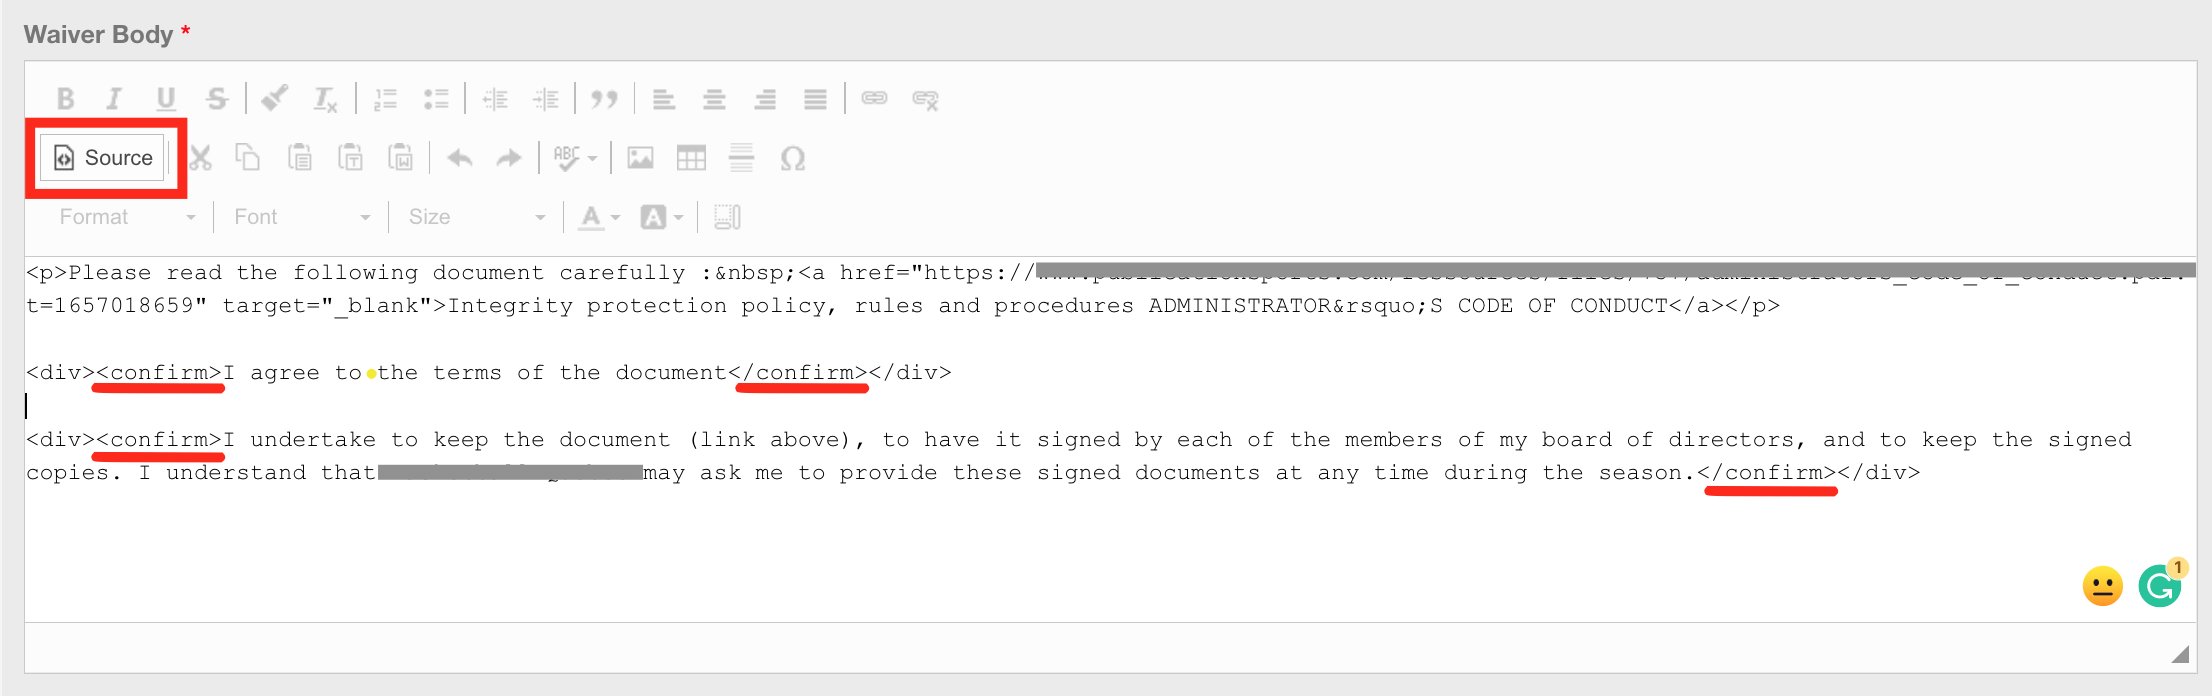
Add checkbox content to your agreement body
The checkbox content is a sentence or a paragraph you want registrants to click on as proof they read it and agree to it. It will look like that for the registrant upon reading and signing the document. For example "I agree to the terms of the document".
To set the checkbox content, you need to switch your content editor to "source mode" and add the following HTML content before and after your sentence or paragraph.
<confirm>CONTENT OF THE CHECKBOX AREA</confirm>
Add custom variables to personalize the waiver (Merge Tags)
Here are some handy HTML shortcuts to fill in the information of the person signing the waiver to tailor it to them.
All system variables (bold below) must be contained within two squiggly brackets. ex:![]()
System variable - description of what it does
participant_full_name - populates the full name of the registrant the waiver is for
participant_first_name - populates only the first name of the registrant the waiver is for
participant_last_name - populates only the last name of the registrant the waiver is for
participant_address_street1 - populates the street address of the registrant the waiver is for
participant_address_city - populates the city of the registrant the waiver is for
participant_address_province - populates the Province/State of the registrant the waiver is for
participant_address_country - populates the coutnry of the registrant the waiver is for
participant_address_postal_code - populates the Postal Code / Zip Code of the registrant the waiver is for
guardian_full_name - populates the full name of the Parent / Guardian of the registrant the waiver is for
guardian_first_name - populates the first name of the Parent / Guardian of the registrant the waiver is for
guardian_last_name - populates the last name of the Parent / Guardian of the registrant the waiver is for
guardian_email - populates the email of the Parent / Guardian of the registrant the waiver is for
Add a "yellow background + red border" section
To highlight a section of a waiver with a "yellow background + red border", add class="yellow-bckg-red-border" into the opening tag of any element you want to be red-bordered with a yellow background.
<div class="yellow-bckg-red-border">THIS IS MY IMPORTANT CONTENT WITHIN THE YELLOW BOX + RED BORDER</div>
Then it should look something like this;
