
In many cases Background Checks are automatically verified during a membership purchase or renewal process. In these cases, if the member has a background check on file from a date that meets the requirements of the organization, the membership requirement will be complete, and nothing more is needed from the member.
Purchasing a Background Check during a membership purchase process
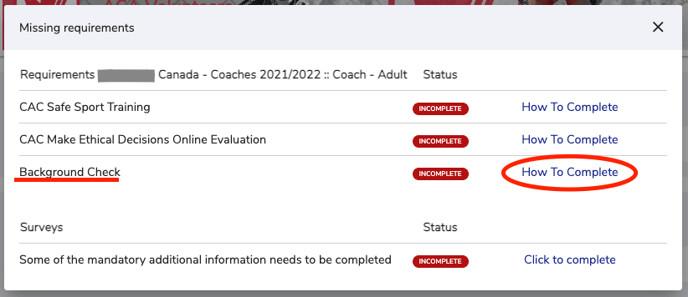
If the member does not have a background check on file, they will see a "Incomplete" status for that requirement, and will be presented with a section similar to below.
If you click "How to resolve" you will see the specifics for that particular Background Check requirement.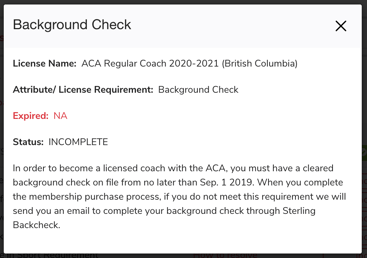
If you require the background check, it will be automatically added to your cart. With some configurations, you are still allowed to remove the background check from your cart, and purchase your membership, however you will still be missing the background check requirement.
Purchasing a new standalone Background Check
To purchase the background check by itself, you can:
- Login to your account on:
CCN https://ccnbikes.com/#!/login 2M https://2mev.com/#!/login HorseReg https://horsereg.com/#!/login PlayerWeb https://playerweb.com/#!/login AthleticsReg https://athleticsreg.ca/#!/login SnowReg https://snowreg.com/#!/login H2Oreg https://h2oreg.com/#!/login IceReg https://icereg.ca/#!/login - Go to your profile, or click "Memberships & Licenses" directly from the account drop-down:
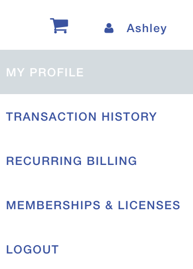
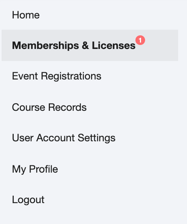
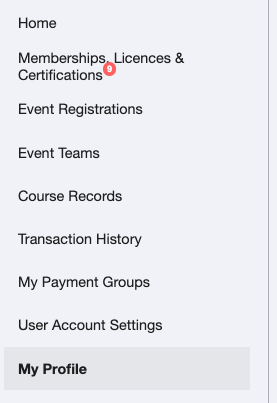
- From your profile area, click on "Memberships & Licenses":
- If there is no valid background check on your profile, simply click on the 'Action Needed' button next to your membership:
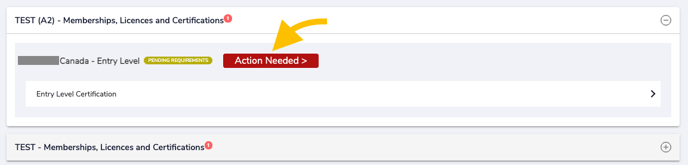
- That will open the requirements list popup:
From the "How to complete" popup, click "Purchase a Background Check Now":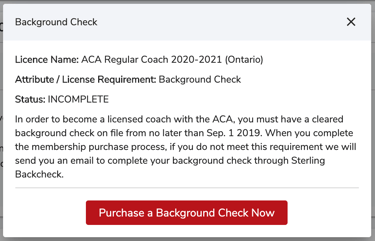
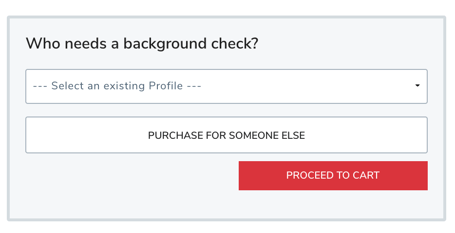
- Select the person who needs the Background Check, and proceed to cart for checkout.
That's it! You'll receive an email from Sterling Backcheck to easily complete the process and once it is complete your membership requirement will automatically be updated.
- If the candidate does not complete their eConsent forms, a reminder will be sent 3 days after the client sent the request. The online questionnaire link is only available for 14 calendar days.
- When the candidate completes the consent forms, but the candidate does not successfully pass their ID Verification, a reminder will also be sent, 3 days after the client sent the request
- When the candidate completes the consent forms, failed EIV and did not complete the alternative ID Verification, the file will be set to ‘Waiting for missing information’ status, and our operations team will send a reminder email 5 days after we receive the completed eConsent forms.
Access your list of existing Background Check requests
If you have at least one background check on file in any status, you can access them from your My Profile menu.
Note: on smaller screens, menus are collapsed under the top left corner 3-dots button ![]()
If you have multiple profiles on your account, you can choose the person you want to manage the background check for by selecting them from the Manage Profile dropdown in the top right corner:

Then, scroll down to the Background Checks section: 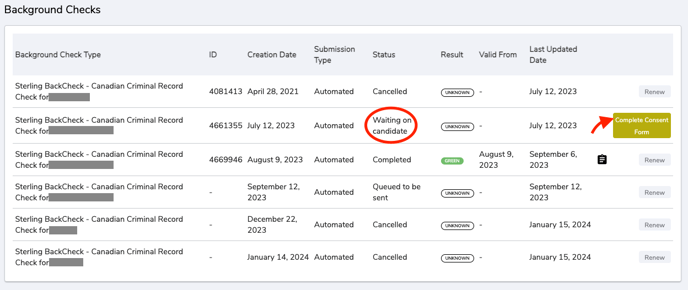
- If you have any pending (waiting on candidate) request, simply click the 'complete consent form' button to access the Sterling Site and finalize your request by following the steps HERE.
- If your request has already been completed by Sterling, you can download a copy of the results using the notepad icon:

Complete your Background check Request on Sterling
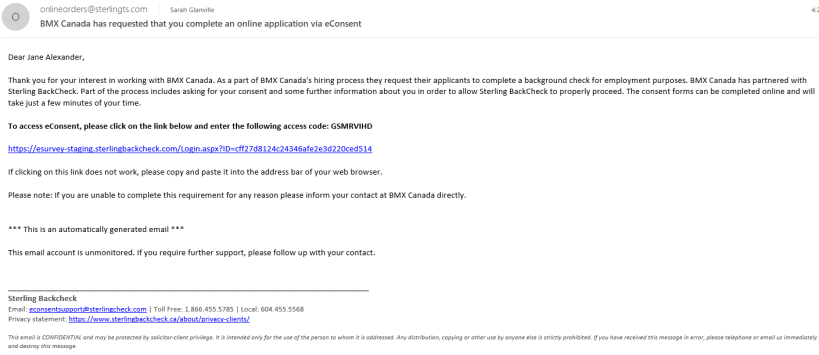
Step One: The candidate will receive an email containing a link and access code to the Sterling Backcheck candidate experience.
The candidate selects the link.

Step Two:
After the candidate clicks the link, they will be directed to the first page of the candidate experience.
The candidate will need to enter their Access Code and click Start.
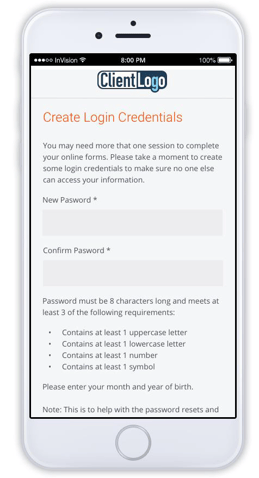
Step Three:
The candidate will be presented with a Credential Creation page.
From here, the candidate will create and confirm a password for this online form along with their month and year of birth.
The date of birth will be used to help with password resets.
Once the candidate has provided their information, they click Start.
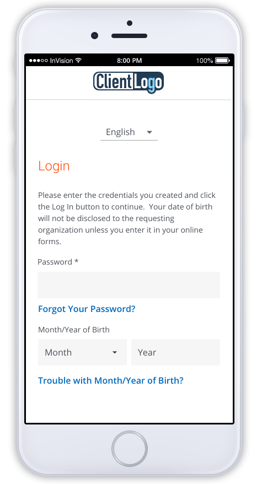
Step Four:
Now the candidate is ready to log on with their newly created credentials.
Once they have entered their password and month/year of birth they click Start.
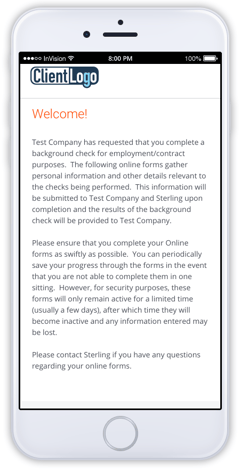
Step Five:
The candidate will be presented with a Welcome page, providing them with some information on their background check process.
Candidate clicks Start to begin their data collection.
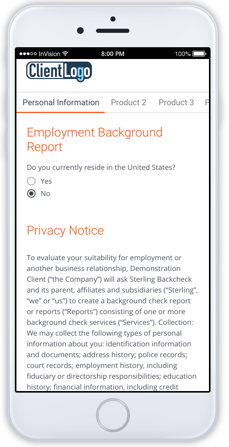
Step Six:
After verifying their location, the candidate is presented with the appropriate privacy notice
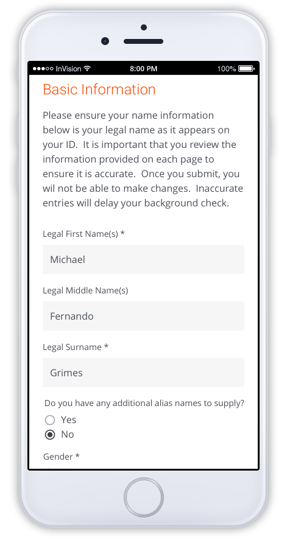
Step Seven:
The candidate will begin entering their personal information and data that is required for their screening.
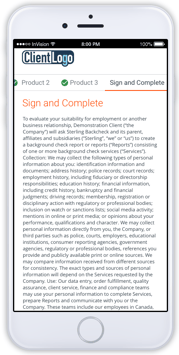
Step Eight:
After providing their data, the candidate will be presented with a Sign and Complete page.
They will first be presented with the consent text required to conduct the services requested for their screening.
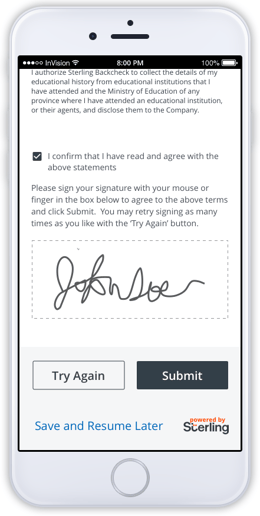
Step Nine:
Next up the candidate can provide consent and their signature.
Candidate clicks Submit.
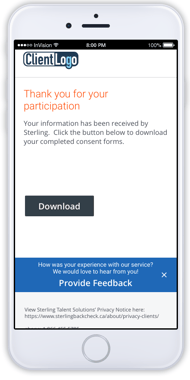
Step Ten:
Candidate will be presented with their final page. There is a copy of their online consent forms available for download.
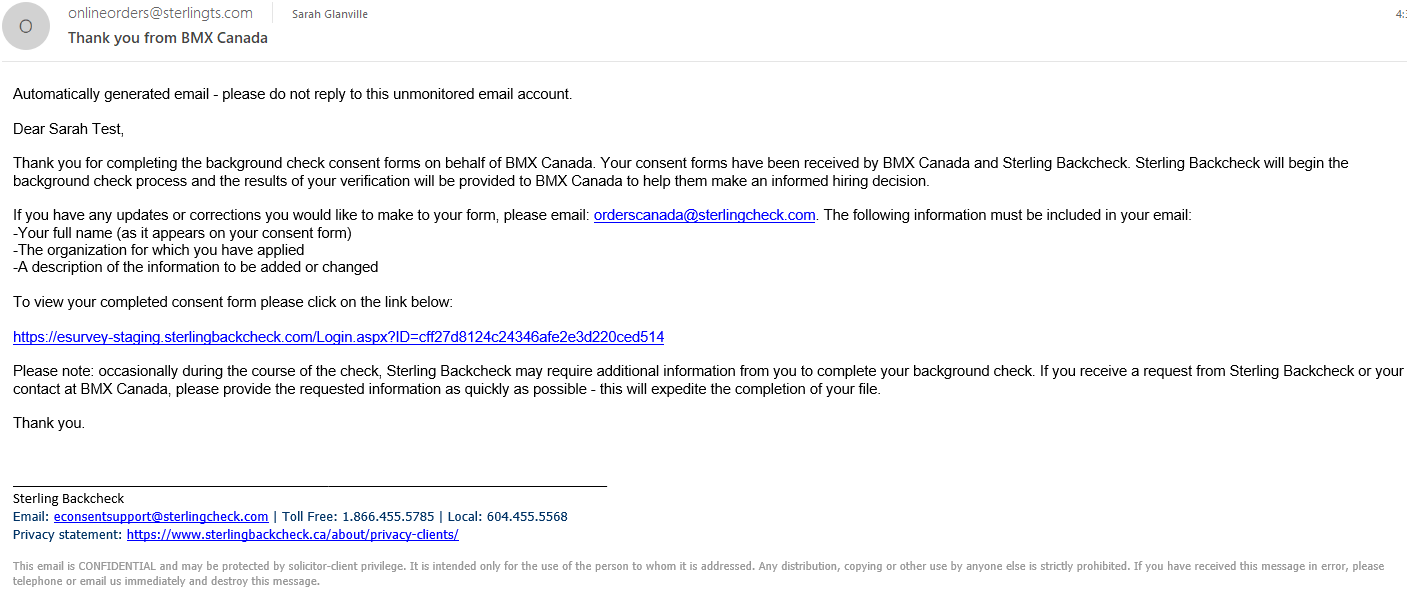
Step Eleven:
The candidate will receive a Thank You email. This provides instructions on how to submit updates or corrections along with a link to access their completed form.
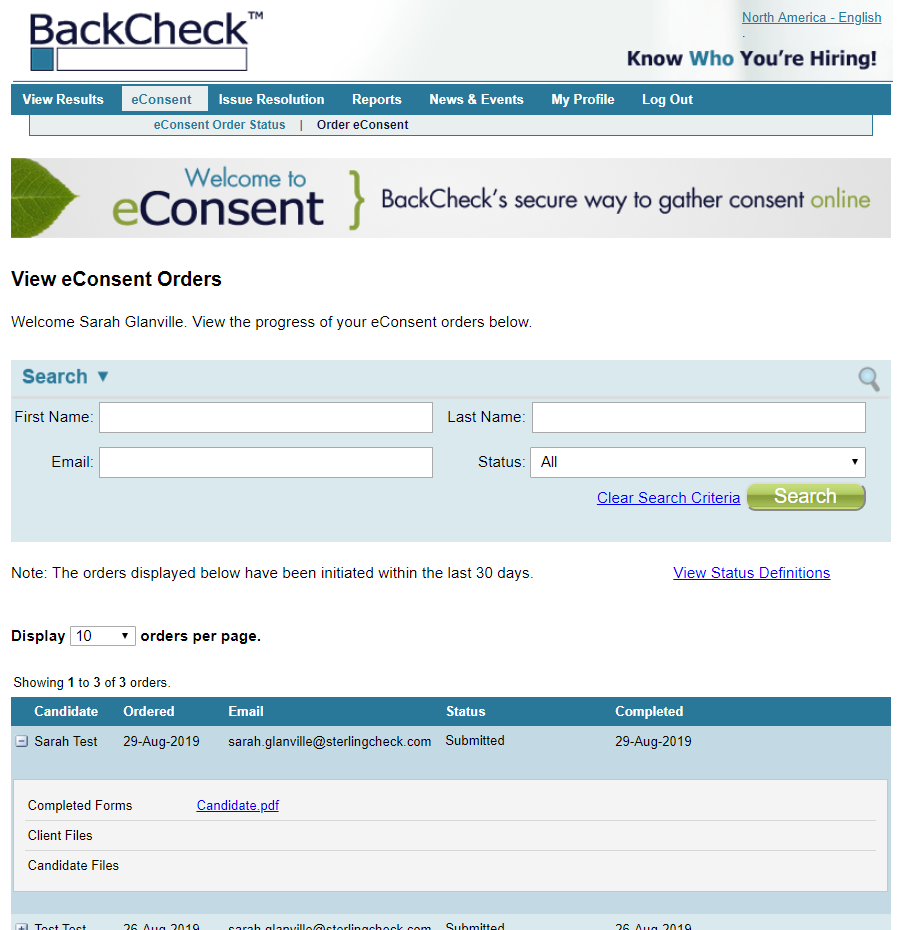
Clients can track the status of their candidate invitations by viewing the eConsent Order Status dashboard.
This displays all invitations initiated in the last 30 days.
The client can download the uploaded documents and completed consent forms.
Candidates/members can download the Canada Post form by logging in through their initial invitation eSurvey link. If candidates/members have lost/deleted the welcome email invite for completing the forms and require help, they can contact the Sterling candidate support team for further walkthrough/assistance on how they can access their Canada Post form:
- 1 866-455-5785
- eConsentsupport@sterlingcheck.com