In this article, we outline the steps you must follow to get started with Paysafe and start accepting payments through our platforms.
![]()
![]()
How to Access my PaySafe Account Creation Form
If you've already access the PaySafe Portal Link directly,
you can proceed to step 1.0 now.
1- Log in to Your Interpodia Platform Account: Visit the Interpodia platform and log in using your usual credentials. Once logged in, access your admin dashboard by selecting 'TOOLS' from the site header.

2- Navigate to Financials & Accounting: On the left-hand side menu, locate and click on the 'FINANCIALS & ACCOUNTING' option.
3- Access Account Details: Within the menu, click on the 'Account Details' tab.

If you're using a smaller screen where tabs are collapsed under a blue banner, simply click on the three white dots to access the tabs.
![]()

4- If your financial organization is part of an 'Organization Group', click on the group name. Otherwise, proceed to the next step.

5- Sign Up for PaySafe: In the 'Scheduled Payout Details' section, locate the "PaySafe" option. Click on it, then select the option to sign up for a new PaySafe account. You'll be redirected to the PaySafe portal to complete the process described below.

1.0 How to Proceed once you've access your PaySafe Portal
1.1 Create an account or Login
1) If you are a first-time user, you will need to create an account to proceed. The login details created there, will also be your Netbanx login details. Fields to be completed:
|
|
|
It is highly recommended to include the name of your organization in the username for better identification.

2) Once complete, read and check the 3 boxes at the bottom of the page, and click Register.

Note: If you have already created an account, you will betaken directly to the login
page.

1.2 Business Information (Stage 1)
1) Complete the following fields:
|
|
Your BUSINESS LEGAL NAME must match precisely with the name of your organization as it appears on your legal documents and bank statements.

2) Click Search.
Note: If there is a match for your company information, you can select it, or manually enter your company details by selecting “I DON’T SEE MY BUSINESS LISTED! ADD BUSINESS DETAILS” and clicking Continue.

3) When your information has been retrieved, the application will prepopulate. If no information is available or “I DON’T SEE MY BUSINESS LISTED! ADD BUSINESS DETAILS” was selected on the previous screen, then the application will need to be completed manually.
Note: If you need to return to a previous page at any time during the application process, click < Go A Step Back.

4) The Business Information fields will be pre-filled by our third party vendor.
Note: If you need to change any of the information, click on the Search Again button.


If you do not have a business/Tax ID number, please use your provincial business number and add zero (0) to get to 9 or remove digits.
You must attach the business article of information if you are part of a province that doesn’t need to register with the Federal government or doesn’t have a business number
> Website Information (If Applicable)

> Additional Business Information

> Statement Descriptor
If you wish to modify your Statement Descriptor (What your customer’s billing statement will display), click on the Edit icon and complete the fields that will pop up.
> Payment Methods
Select your Payment Method followed by your Settlement Currency.
You must choose at least one payment method in order to proceed through the form.
Note: You will be able to configure the “By Default” currencies configured by clicking + Do you want to price/trade in any other currency? If other currencies are required, they must be requested separately.
> Mandatory Compliance
Note that if you select “I do not confirm that I comply with all applicable sanctions regimes”, you will be required to provide further details.
5) Once all fields are complete click Save & Continue.
1.3 Ownership Information (Stage 2)
1) Click + Add Business Representative and complete the required fields that appear.
For Canadian organizations only:
Please note that Paysafe will require you to enter you SIN number. If you don't want to enter this information, you can enter the following 'dummy number': 123456789

During account verification, Paysafe will request your driver's license or passport if you don't enter your real SIN number.
Note: If the Business Representative is also a director, enable the This individual is a Director tick box.

2) Click Save.
3) If you wish to add additional Business Representatives, click “+ Add Business Representative”.
Note: It is possible there will be only one applicant in the application.
4) Enable the box at the bottom of the page confirming the information you provided is true and click Verify.

5) Once complete, an auto verification will run.
If the electronic verification (eKYC) fails, you will be required to upload Additional documentation.

6) Enable the Notice confirming that the information is true and click Continue.
7) You will then be presented with a page outlining what documentation is required. Click each button and upload the required documentation.

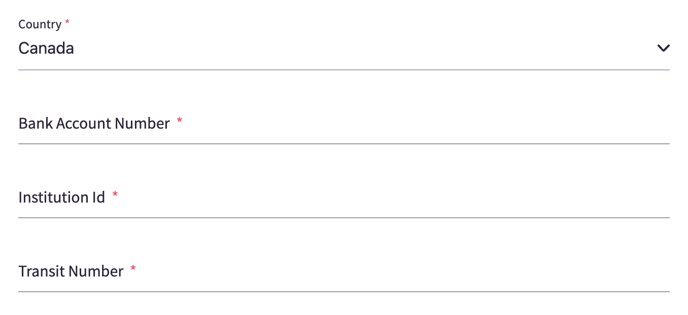
1.4 Banking Information (Stage 3)
Stage 3 of the application is for your banking information.
IMPORTANT NOTE: The bank account information submitted must match the merchant account name input in the "Doing Business As (DBA)" field in Step 1 of the application. If the names do not match, PaySafe may not validate your banking information and may not deposit funds in a timely manner.
Verification is being completed via our third party provider, your credentials will not be stored anywhere.
1.4.1 Manual Setup (Default)
A void cheque or bank statement will need to be uploaded for verification. For any additional settlement currencies, banking proof and details will berequired (even if the bank details are the same for each settlement currency).
1) Select Enter Bank Details Manually.
2) Enter the following information:
|
|
|
3) Upload a void cheque or bank statement.
1.4.2 Automated Setup (Eligible organizations from the US may be presented with that option)
1) Select Link Your Bank.
2) Under Choose your bank enter your bank’s name and select it from the list of banks that appear below.
3) Enter your bank Username and Password.
4) Click Proceed.
5) Enable the box providing permission and click Confirm.
Note: You will see a list of the details required. By clicking on the “+” you can see a more detailed description of what you are agreeing to.
6) A Successfully Connected window should appear.
You will then be auto redirected to the bank page. If you have multiple banks listed select the one you need. You will now see your account has been linked. Click Save & Continue.
Note: If you have multiple Settlement Currencies selected (as seen on the Business Information page), you will be required to link each account separately.
1.5 Review & Submit (Stage 4)
This is the final stage of the Onboarding process where you will review your Business,Ownership and Banking information. If you find a mistake, click the Edit icon to open the change editor.


Once satisfied, Enable/Disable the first tick box and enable the second tick box confirming your acceptance.
4) Click Sign & Submit. This will take you to the DocuSign page.
5) On Docusign, you will be asked to read and agree to use electronic records and signatures.

6) Here you can review the entire application before signing at the bottom of the final page.
7) Click Finish.
8) The following page should appear confirming your application has been sent and detailing next steps.
![]()