You can use admin fees to manage various scenarios where you need to charge a fee to a specific individual.
Setting Up Administration Fees
-
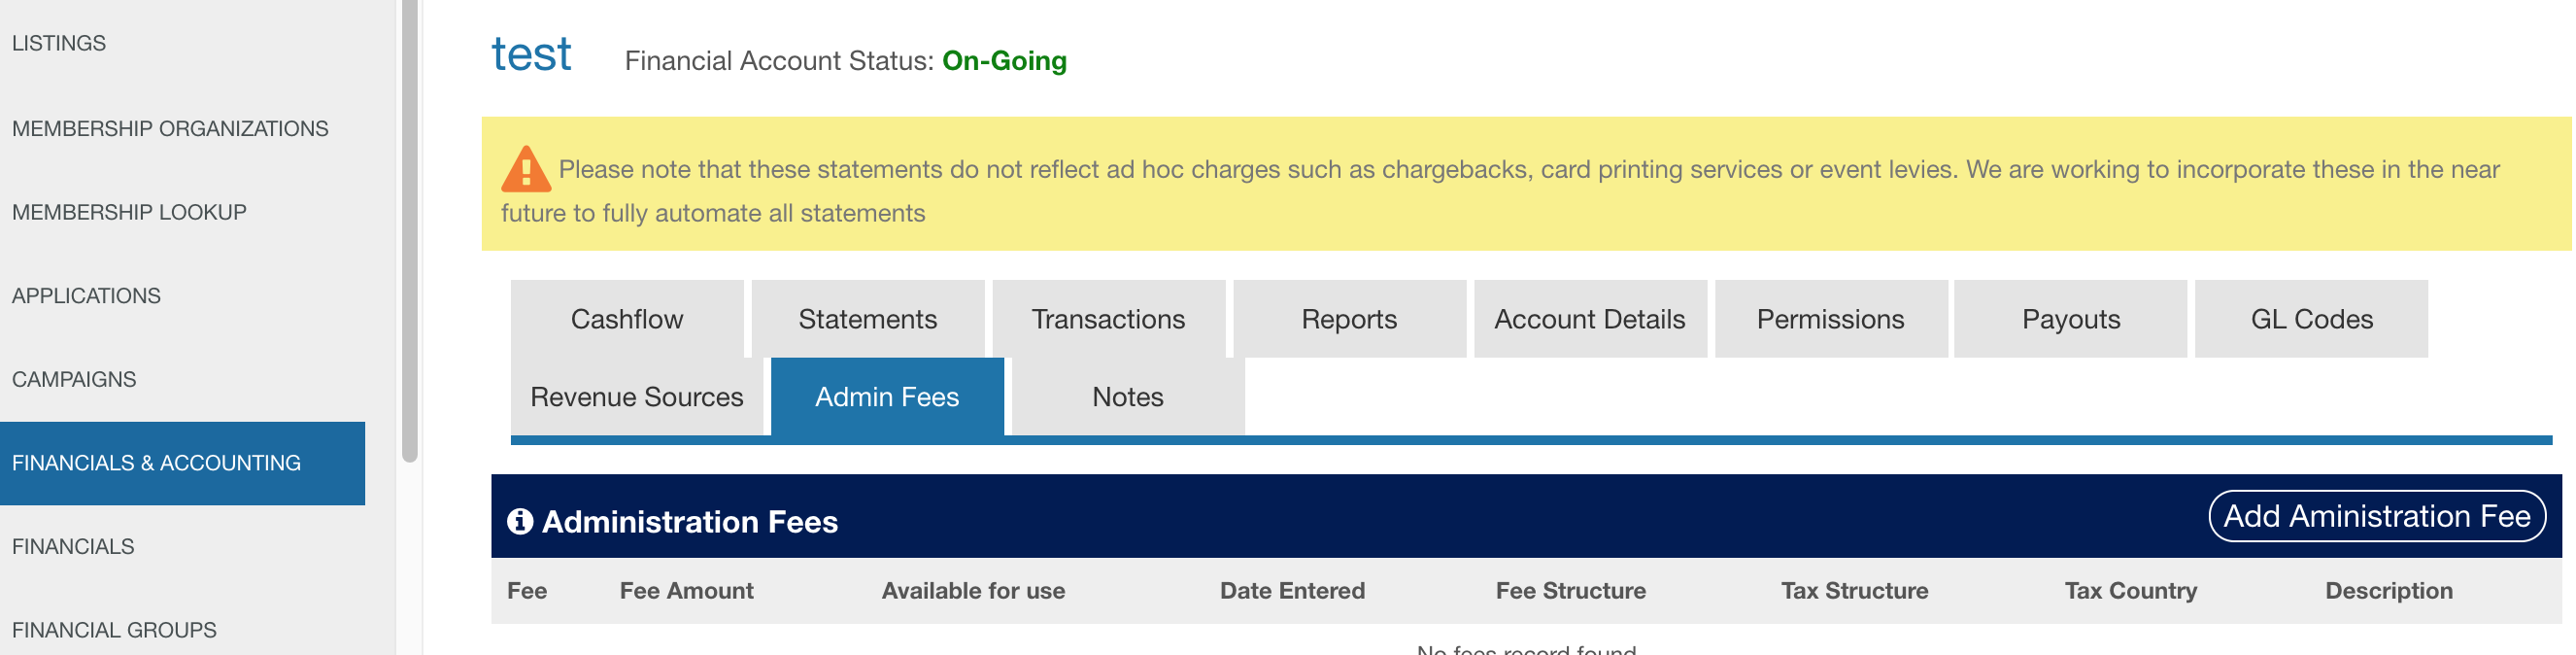
Access your Financial Account dashboard:
- Navigate to your Financials and Accounting menu.
- From the drop-down menu at the top of the page, select the financial account under which you’d like to charge fees.
-
Add an Administration Fee:
- Access the Admin Fees tab.
- Click on Add Administration Fee.
-
Enter Fee Details in the Pop-Up Form:
- Fee Name: Enter the name of the fee.
- Description: Provide a brief description of the fee.
- Amount: Specify the amount to be charged.
- Tax Country: If applicable, select the country for tax purposes and enter the associated tax rate.
- Processing Fee & Tax Structure: Define the processing fee and tax structure.
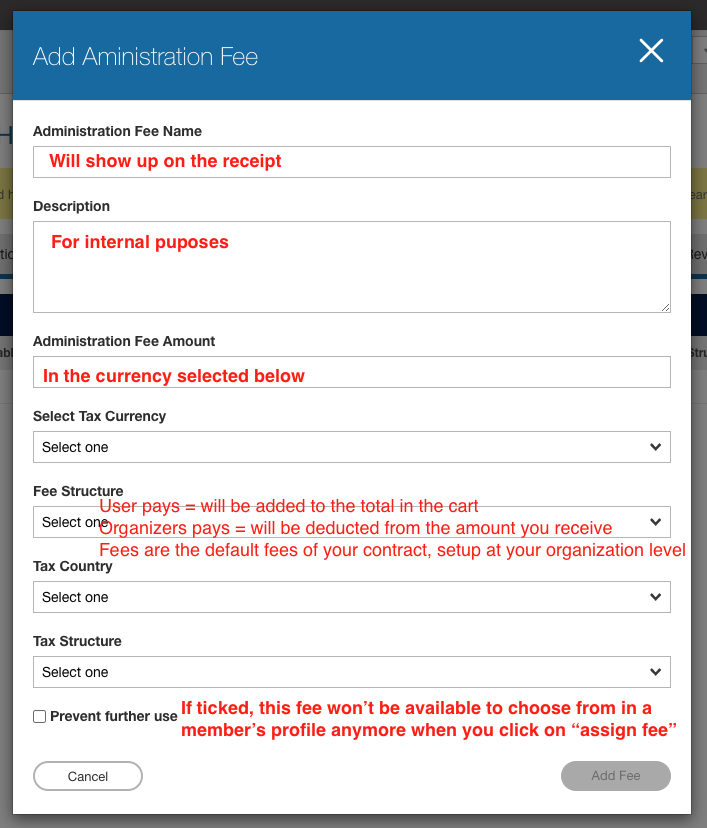
- Save the Fee:
- Once all details are entered, save the fee. It will now be available in your list of fees.

(Optional) Assign Revenue to a Specific GL Account
If you need to post revenue for the fee to a specific General Ledger (GL) account, pause here and refer to the article: Assigning Revenue Accounts to Products or Services
Charging a Fee to a User's Cart
-
Search for the User:
- Go to the USER ACCOUNT PROFILES (PEOPLE) menu.
- Search for the person by name or email who needs to be charged the fee.
- Open their Profile Details.
-
Assign the Administration Fee:
- Scroll down to the Fees section.
- Click Assign Administration Fee.

- Choose the fee to be charged from the dropdown menu.
- Click Assign Fee.

- Fee Assignment:
- The fee is now assigned to the user’s cart under their profile.
- The user cannot complete any new transaction without paying this fee to your financial account.
User Payment Process
Notify the User:
- Instruct the user to log in to their account and visit their cart by clicking the cart icon in the site navigation bar.
- The fee will appear in their cart and cannot be removed by the user.
- The user can simply pay for the fee as usual by credit card.
Additional Admin Actions
-
View Order Details:
- Once the fee is paid, view the order by clicking View in the Profile Details where the fee was assigned.
-
Remove Fee (If Needed):
- As long as the fee is unpaid, if the fee no longer needs to be charged, go back to the user's profile and click Delete to remove the fee requirement.
