Please find below the tool to manage your ACC data
- How to bulk upload data (applicable to staff/mec/SoC/first nation memberships)
- How to manually adjust existing data when the member got the wrong membership type
- How to add a missing ACC National purchase onto an existing ACC National membership
- How to manually add a section membership on one's profile
- How to manually add an additional member onto a family membership
How to bulk upload memberships
- From your MEMBERSHIP ORGANIZATIONS TAB
- Search for the name of the process you need to adjust/add membership for:
- Alpine Club of Canada - Memberships
- Alpine Club of Canada (SECTION NAME) - Memberships
- Open the dashboard, and click on:

- Select the relevant import type (for section, only one option is available), for ACC, you have 6 options (choose wisely!):
| Alpine Club of Canada - Memberships (ACC/MEC Staff) | To import ACC/MEC staff memberships (initial or future) |
| Alpine Club of Canada - Memberships (Life/Honorary Members) | To import life or honorary memberships (initial or future) |
| Alpine Club of Canada - Memberships (First Nation) | To import first nation memberships (initial or future) |
| Alpine Club of Canada - Memberships (Student Outdoor Club) | To import SOD memberships (initial or future) |
- Once you've selected the relevant option, click on 'Import Template' to download the document to fill:

ONLY THE TEMPLATE DOCUMENT CAN BE USED TO UPLOAD MEMBRESHIPS.
How to complete the template
- The column title is in bold? The field is required
- The column title is not in bold? The field is optional (you can leave it empty if needed)
The following columns must be completed with text:
- First name / Last name / E-mail

- Date of birth - Mind the format
- Street / City

- Postal code / Telephone

The following columns should be filled using the drop-down list pre-populated for you (these cells have data validation)
- Gender (F - Female / M - Male / U - Unspecified)

- Membership Type
(be aware, when importing, the system checks the membership rules, so if you add a member who is not of age for the chosen membership, then we will not create it in the system, and the import report will inform us)
If multiple members (rows) have the same membership type, you can copy-paste but be sure to keep the drop-down selection format.
- Country / Province-State
Make sure to select country before province/state

Once you have entered all the necessary data into your template file, be sure to save it correctly (in xlsx format) before proceeding to the next step.
2. Perform the bulk import following the instructions of the MEMBER IMPORT GUIDE
- Click on select file and choose the file you need to import - make sure you have imported the correct one by checking the name of the 'selected file'
- - Make sure you have accepted the disclaimer AND deactivated the confirmation emails

- Click Upload File
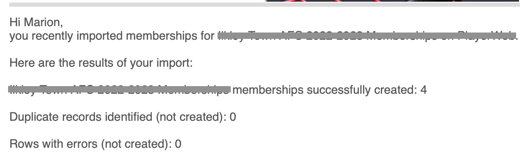
- The import will start, and once completed, you will receive an email with the result. Moreover, your imported members will receive their confirmation email with their membership card (if applicable)
The results email will look like this - if you have any questions about the import report, please contact info@interpodia.com.
How to manually adjust existing data when the member got the wrong membership type
- From the profile details page or the MEMBERSHIP MENU
- Open the membership details page of the membership you need to adjust
- Then, scroll down to the 'Purchased Groups' section of the membership detail (each purchased group represented one occurrence of membership that a member had/have, as well as the type of membership they got for the defined validity period) - From there:
-
- CANCEL the purchased group in error by clicking 'Edit' and changing the status from complete to cancelled
-
-
-
- Then, you need to add the correct option (group) instead, from the "Add a new group" dropdown:
-
-
-
- Once the new group has been added, you need to activate it:
- Click edit on the new group
- Enter the needed valid from and valid to dates
- Ticket the sub-category check box in the top right corner
- Save
- Once the new group has been added, you need to activate it:
-
How to add a missing ACC National purchase onto an existing ACC National membership
- From the profile details page or the MEMBERSHIP MENU
- Open the membership details page of the membership you need to add a purchase group on
- From the "Add a new group" dropdown, select the missing membership type
- Once the missing group has been added, you need to activate it:
- Click edit on the new group
- Enter the needed valid from and valid to dates
- Ticket the sub-category check box in the top right corner
- Save
How to add a missing section membership
Follow the setup in that guide:
How to manually add a membership or license to someone's profile
And in STEP 4 search for the section's name.
How to add an additional member onto a family membership
1- Ensure that the additional member has a profile on the 2M platform by searching for their first and last name in the PROFILES menu
> If they don't, create a profile for them using the "Create a new person" button
2- Follow the setup in that guide:
How to manually add a membership or license to someone's profile
And in
- STEP 4 search for the "Alpine Club of Canada - Memberships" organization.
- STEP 7 select the family membership roles applicable for that member (adult #2 / child) > Make sure NOT TO select any IMPORTED or PAST MEMBERSHIP option.
- STEP 10 ensure that you enter the valid from and valid to dates for the additional member that match the existing family membership.
- STEP 11 don't forget to fill out the additional questions, and send out the waivers for signature.